Travis CI Documentation
Travis CI Onboarding
Prerequisites Get Started with Travis CI Add a .travis.yml File Switch Accounts Select a different programming language Further ReadingThis is a short guide to using Travis CI with your cloud platform-hosted code repository. If you’re new to continuous integration or would like some more information on what Travis CI does, start with Core Concepts for Beginners instead.
Prerequisites #
To start using Travis CI, make sure you have the following:
A GitHub, Assembla, Bitbucket, or GitLab account. Owner permissions for a project hosted on GitHub, Assembla, Bitbucket, or GitLab.Get Started with Travis CI #
Get started with Travis CI, a continuous integration service used to test and build software projects hosted on GitHub, Assembla, Bitbucket, or GitLab.
Sign up for Travis CI.Go to Travis-ci.com and Sign-in with your preferred account.
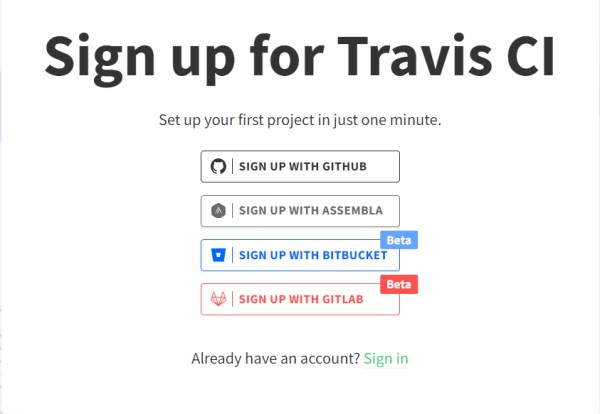
Once redirected to your chosen platform, log into your account and accept Travis CI’s authorization request.
If you have any doubts about the Travis CI access rights to your chosen platform, read more details here:
GitHub Authorized OAuth App. GitHub permissions used by Travis CI. Assembla permissions used by Travis CI BitBucket permissions used by Travis CI GitLab permissions used by Travis CI Select a Plan.Choose the best plan for you, or get started with our Trial Plan.
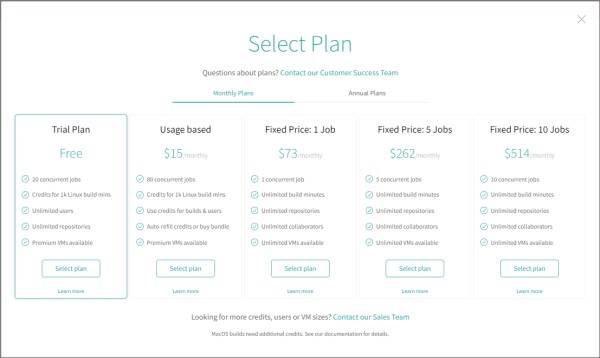
To commence the selected plan, you must first insert your billing information and a valid Credit Card.
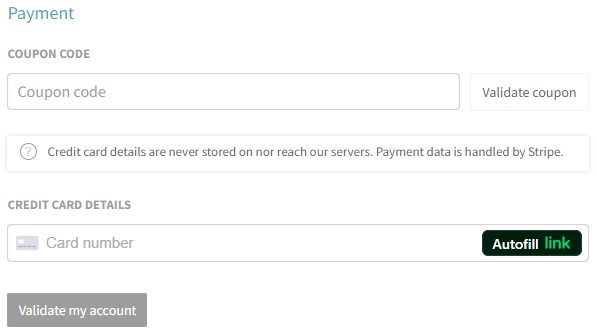
Note: For Trial Plans, credit card authorization may result in a small fee being held on the card for a short duration. Trial Plan users are granted a small allotment of trial credits to be used within the next 14 days.
Settings configurations.In your Travis Dashboard, click on your profile picture at the top right and select the Settings option to see a list of your available repositories.
Select repositories.Click the Manage Repositories button. Once directed to your chosen platform, select the repositories you want to use with Travis CI.
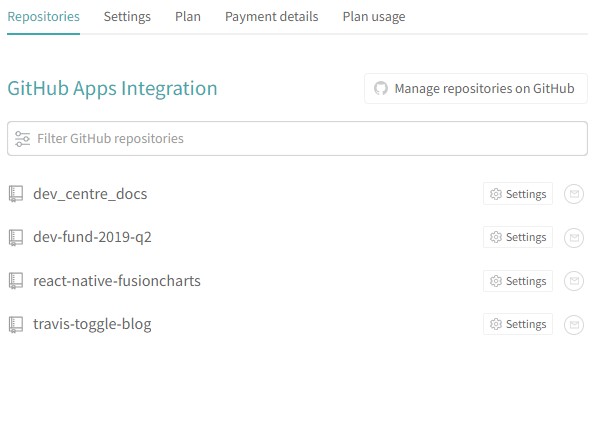
Depending on your chosen platform, you can also make this selection with the authorization message by clicking the Activate all repositories button on the Getting Started page to activate all your repos.
GitHub Student Developer Pack users #
If you use a GitHub account and are eligible for the GitHub Student Developer Pack, the Travis CI plan might not be assigned automatically. This occurs because the user already has a plan assigned in Travis CI.
If you wish to use the free allowance for the GitHub Student Developer Pack instead, please contact our support team, provide your GitHub handle, and request the assignment of the respective plan.
Add a .travis.yml File #
The next step is to add a .travis.yml file to your repository to tell Travis CI what to do. The following example specifies a Ruby project built with Ruby 2.2 and the latest version of JRuby.
language: ruby rvm: - 2.2 - jruby
YAML
The defaults for Ruby projects are bundle install to install dependencies, and rake to build the project.
Add the .travis.yml to a specific location in your repository.
Travis only runs builds on the commits you push after you’ve added a .travis.yml file. Finally, visit Travis CI and select your repository to check the build status page to see if your build passes or fails according to the return status of the build command.
Assembla .travis.yml File Configuration #
This section documents the new Assembla option that is currently in beta.
For Assembla users, configure the .travis.yml as follows:
Git Repository: in the repositories root (main and branches). SVN Repository: 1. In the /trunk/ (default is /trunk/.travis.yml) for builds to run after commits to trunk. 2. In the /branches/<branch name>/ (e.g.,/branches/abc/.travis.yml for branch named abc) for builds to run after commits to a specific branch. P4 (Perforce Helix Core) Repository: 1. In the /<depotname>/main/ (default is /depot/main/.travis.yml) for builds to run after submits to /<depotname>/main. 2. In the directory respective to specific stream /depot/<stream name>/.travis.yml (e.g., /depot/abc/.travis.yml for stream abc) for builds to run after submits to a specific stream.IMPORTANT
Perforce depot/repository may be very heavy, so downloading it fully for build (e.g., terabytes of data) is often unwanted, as the source code to be built/tested is only a fraction of the whole depot size. To download it partially, a Travis CI user must define a specific subpath, which is later downloaded by the Travis CI build job. Such subpaths may be defined using the perforce_test_path tag within a .travis.yml file. If the property is not provided, the default behavior is downloading the whole depot/repository.
See the example below for reference.
dist: focal language: ruby rvm: - 2.2 - jruby perforce_test_path: /your/subpath/within/repository/which/will/be/downloaded
YAML
Perforce and SVN builds are currently available only for Linux Ubuntu and standard amd64 CPU architecture build environments, starting from the Bionic Beaver Ubuntu distribution.
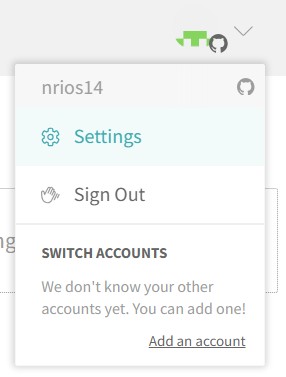
Switch Accounts #
You can easily switch between your cloud platform provider accounts:
Click on your account icon in the top right corner on Travis-ci.com.
Select the desired account and have fun using Travis CI.
Select a different programming language #
Use one of these common languages:
language: ruby
YAML
language: java
YAML
language: node_js
YAML
language: python
YAML
language: php
YAML
language: go
YAML
Travis CI supports many programming languages.
Further Reading #
Find more useful information in our Tutorial pages:
Sign up for Travis Get Started with Travis CI Core concepts for Beginners Travis CI Tutorials网址:Travis CI Documentation https://mxgxt.com/news/view/1704135
相关内容
如何使用 CI 可视化Travis的艺人档案
Travis造型背后
金小妹和Travis复合了?!
CI设计的最佳实践:如何有效塑造企业形象【尼高品牌设计】
金小妹、Travis Scott 分手实锤!?
Travis Scott:我一直为 12 岁的自己做事
吴亦凡曝《Deserve》封面 晒与Travis Scott合影
Metro Boomin 与 Travis Scott 和 Young Thug 的合作歌曲《Trance》
Travis Scott新歌《K Pop》:明星合作与音乐期待
随便看看
最新实时动态
- 张远现场跳新歌《月光闪》舞蹈,简直帅炸了!
- 陈丽君:去台北演出后惊觉台湾离我们是那么近!
- 260327 redgala之夜 小金鱼虞书欣
- 一念关山:这句“你受得了吗”某人吃醋了,你有伤,我也伤
- 这一刹那,我只看得见你
- 明意坦白了身份纪伯宰才是真正的太子君上却想杀了
- 檀健次,广西北海人,内地演员、歌手、舞者,MIC男团成员…
- 再读鲁迅的《铸剑》:暴君的头颅坠入鼎中之后,看客依然跪着
- 梅程两大经典登陆广州艺术季,史依弘如何无缝切换两种气质?
- 李彩瑛称照片误拍电子烟,品牌方主动联系
热点实时动态
- 128624
- 25461
- 20059
- 19747
- 19496
- 19453
- 19187
- 18756
- 18733
- 18706